¶ TP-Link VR1600v
EWAN Migration
This guide will walk you through the steps to configure your TP-Link VR1600v modem for Ethernet-based internet connections, including NBN Fibre to the Premises (FTTP), Fibre to the Curb (FTTC), Hybrid Fibre Coaxial (HFC), and Fixed Wireless (FW) services.
Connect Your Modem
- Connect the ethernet cable from the from the nbn outlet to the WAN port on the back of the modem.
- Connect the modem to power and turn it on.
- Connect your computer to the modem either through the LAN network cable or via WiFi.
(The default Wi-Fi password can be found on the the base of your modem.)
Configuring Your Modem
- To access the modems web interface, open a browser and enter http://192.168.1.1/ or https://192.168.0.1/ into the address bar. We recommend using a desktop computer as the modem’s web interface isn’t designed for mobile.

- Log into the admin interface. The default username is admin and the default password is admin. These can be found on the bottom of your modem.

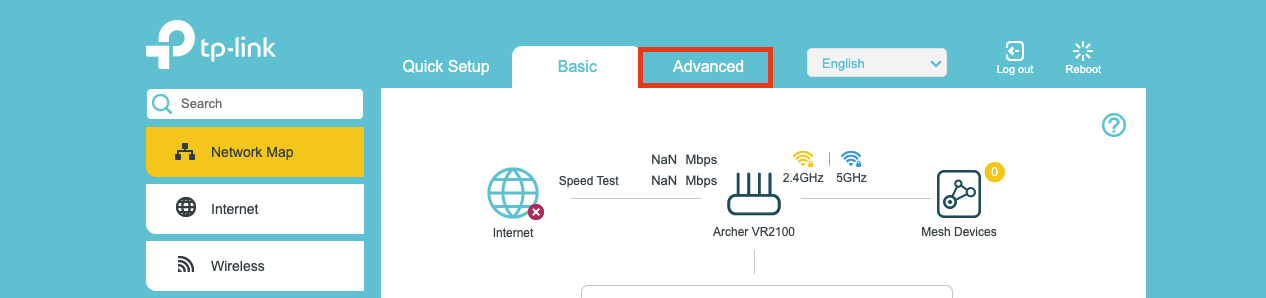
- Navigate to the Advanced tab from the top of the page.
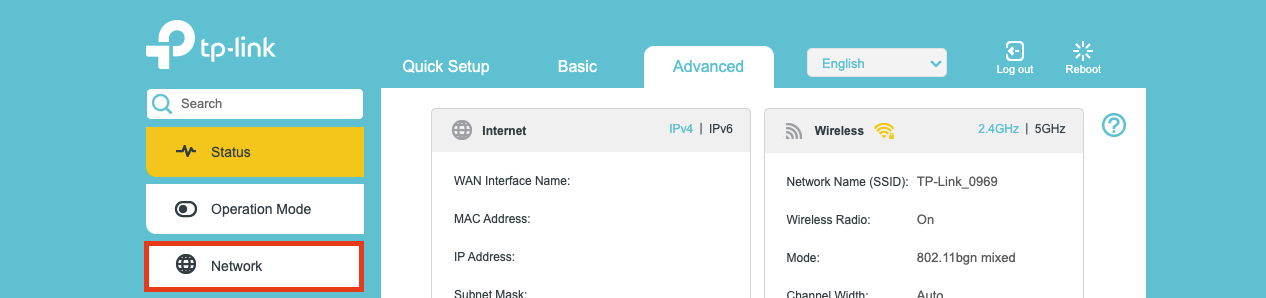
- Then select Network from the left hand side.
- And finally select EWAN to enter the Internet Setup page.
- The field “Internet Connection Type” should be set to the value “Dynamic IP“.
- Click Save.

DSL Setup
This section applies to NBN FTTN (Fibre to the Node) and FTTB (Fibre to the Basement) connection types.
- Plug in the power adaptor and power on the device.
- Use the supplied ethernet cable to connect a computer to one of the yellow LAN ports. You can also connect wirelessly, however, we recommend an ethernet connection.
- Connect your NBN service to the grey DSL port on the back of your TP-Link.
- Using a web browser navigate to http://192.168.1.1, and log in with the username
adminand the passwordadmin. (If the default login doesn’t work you may need to factory reset your device).
- Select the Advanced tab.
Select the Network tab.
Select DSL from the menu.

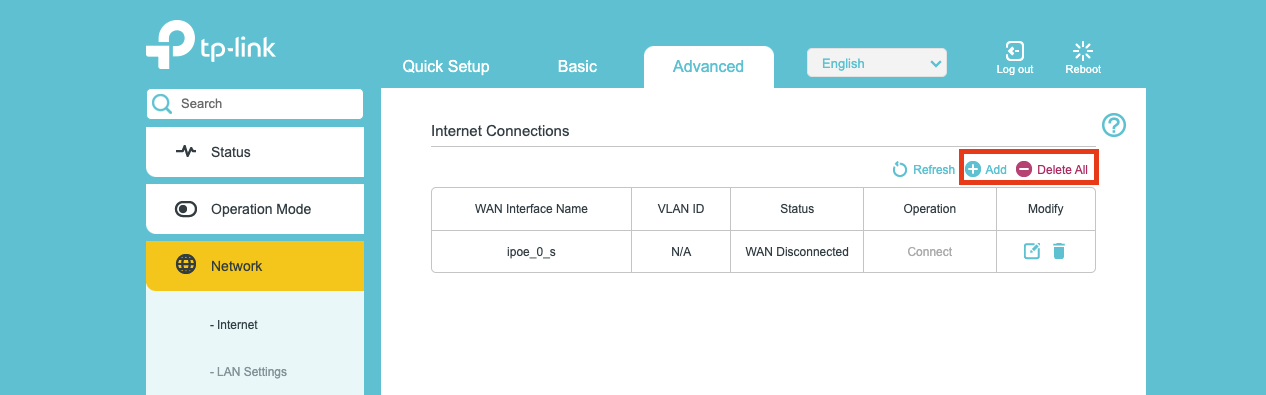
Delete any pre-existing connections and then click Add.
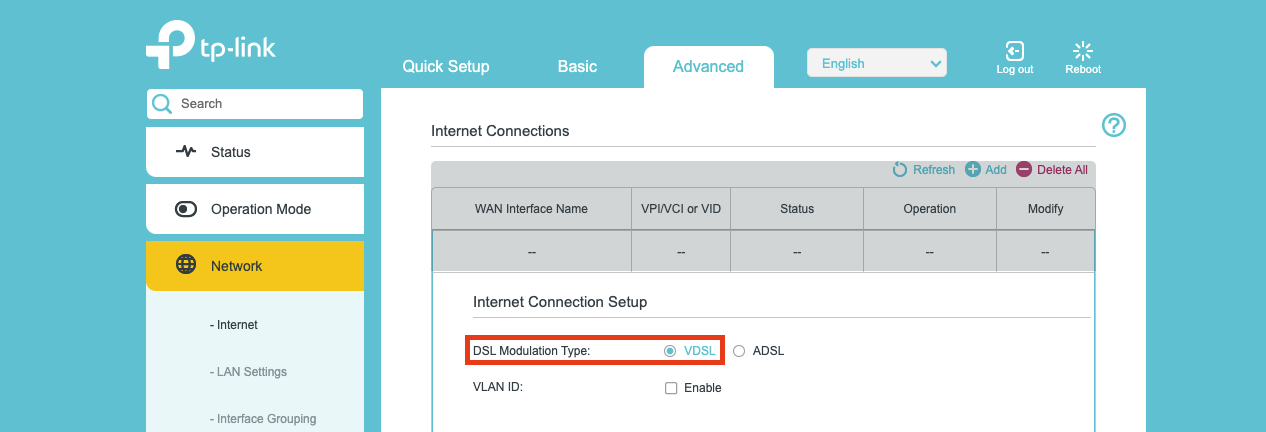
From the `DSL Modulation Type` menu, select VDSL.
Disabled VLAN ID Leave unticked
From the `Internet Connection Type` menu, select IPoE or Dynamic IP

Leave all other settings as their defaults, and you’re done! Hit Save and you should be online.
Hit Reboot at the top right